


Although most floppies hold just 1.44MB, it could be holding something irreplaceable, like old journals and precious photos. If you've just found one in your drawer, you may want to check it on your computer. So how can you access the floppy? Or what can you do if its data is inaccessible? This guide walks you through the process, from accessing floppy disks on Windows to data recovery from floppy disks.
We tested every floppy type out there - 3.5-inch, 5.25-inch, high density, double density and found the best way to make each one readable on a Windows machine. And if you're dealing with data loss on top of that, we'll show you how to get those files back too, using both free and paid options.
Step 1: Connect Floppy Disk to Windows
Before you can recover anything, Windows has to detect the floppy disk. The problem is that almost no computer or laptop ships with a floppy port anymore. So you have to rely on external gear just to let the machine read the disk.
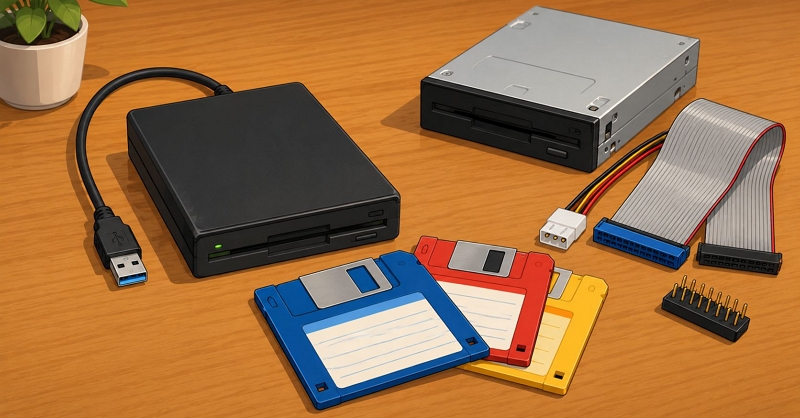
The common option is a simple USB floppy drive, which will work for most of you. You just have to buy a 3.5" USB floppy drive and wait for it to arrive.
- One popular option is TEAC. You’ll find two models: the FD-05PUB and FD-05PUW.
- Sabrent’s FL-UDRV is the other pick.
You can get these reliable brands for US$50. Make sure to avoid unbranded ones.
But keep one thing in mind. These USB drives cannot read every floppy disk. Usually, they work with three formats. Here is a table to work out whether yours is covered.
If your disk sits in a Yes row, buy a USB drive, such as TEAC FD-05PUB or Sabrent FL-UDRV. Then move on to the next step.
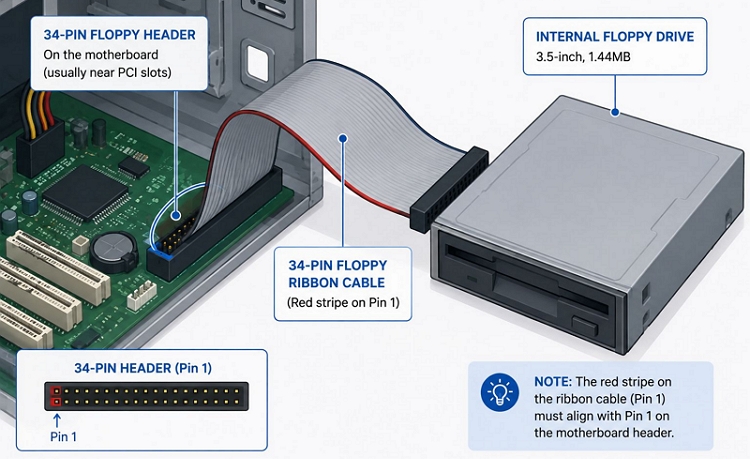
If a USB drive will not work for your disk, you have two more routes. You can use an internal floppy drive that is only for legacy hardware. If your motherboard has a 34-pin floppy header, you can connect an internal drive straight to that header.
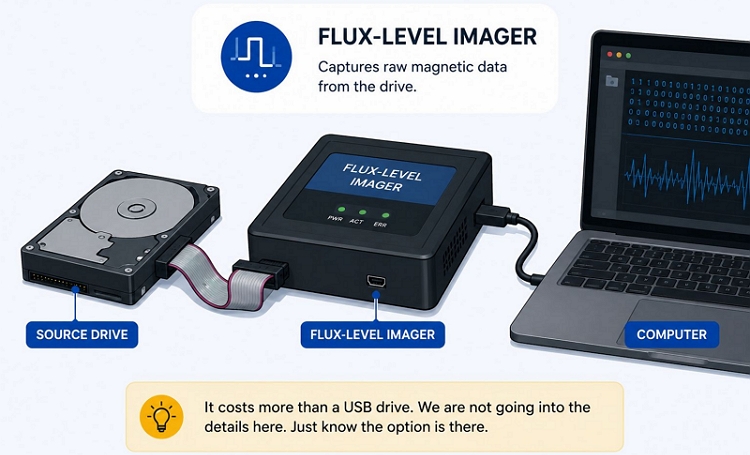
The other option many users go for is a flux-level imager. It costs more than a USB drive.
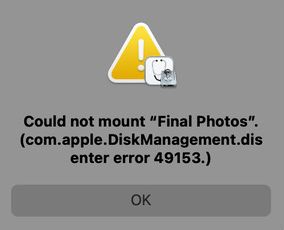
Also, make sure you’re following these steps on Windows devices. While some floppies work on macOS, most of the time Disk Utility will simply throw error 49153 and will not recognize the disk. So if you do not have a Windows device, borrow one from a friend for a while.
How to Connect Your Floppy Disk Using a USB Floppy Drive
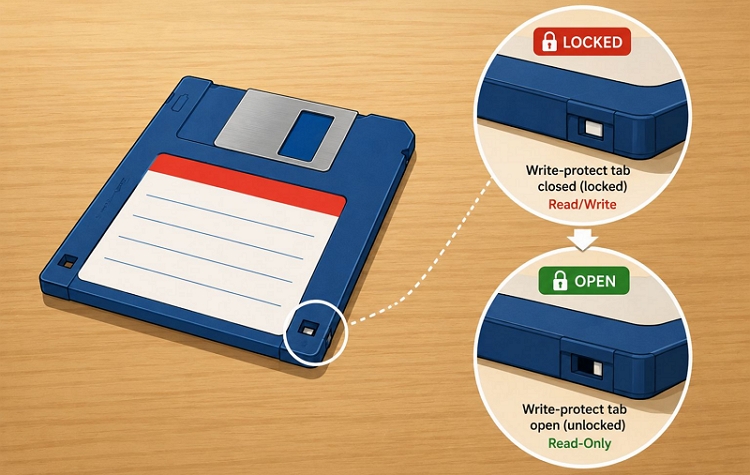
Step 1. Flip the write-protect tab. Look at the edge of the disk opposite the end that goes into the drive. You'll see a small square slider there. Push it so the hole is open. The disk is now read-only and no drive can write to it — accidentally or otherwise. Do this before anything else.
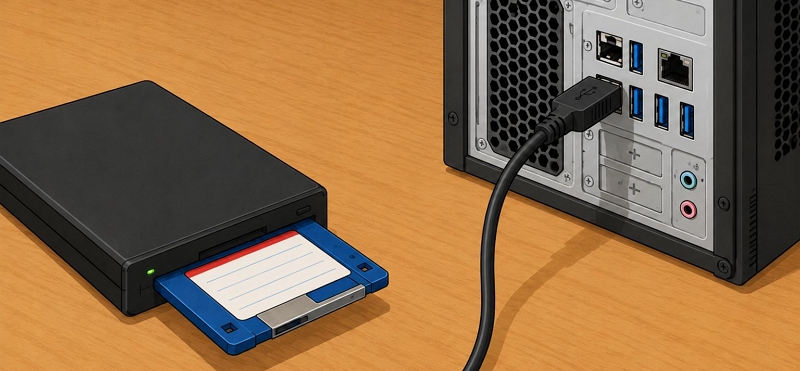
Step 2. Insert the disk into the USB floppy drive while the drive is still unplugged.
Step 3. Plug the drive into a rear USB port on the PC.
Note: Rear ports are recommended. These USB floppy drives draw 5V at 500mA, so they need a steady power supply.
Step 4. If the driver is already on your machine, you do not have to download anything. Otherwise, the USB drive seller usually tells you where to get the required driver and how to install it.
Step 5. Open File Explorer. Click This PC. The floppy will appear as a removable drive.
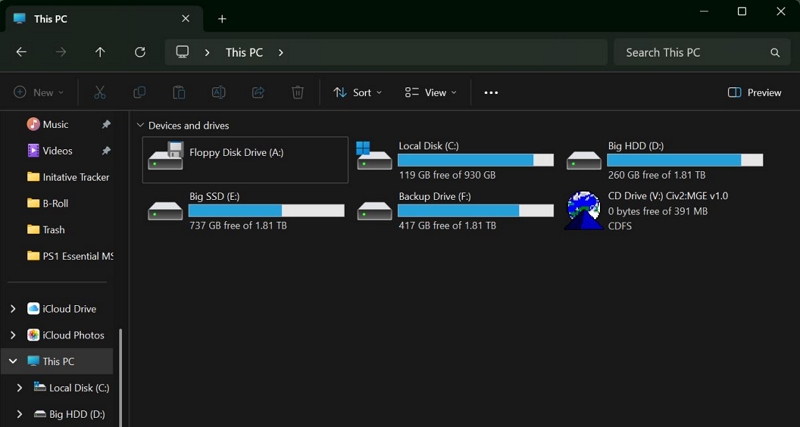
Note: Sometimes Windows will not show it as A: or B: in File Explorer. In that case, do this:
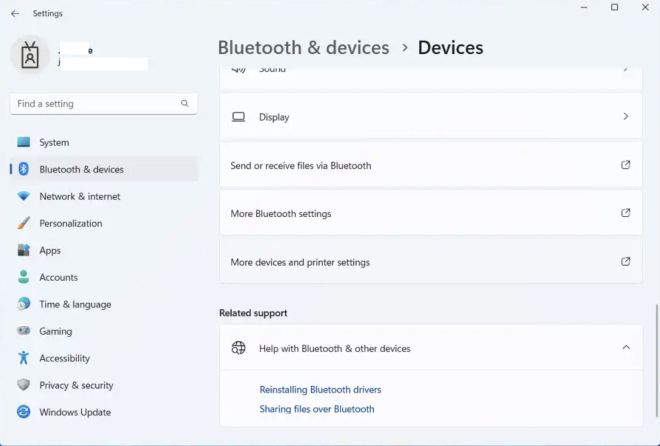
- Open Bluetooth & devices.
- Scroll down to Devices.
- Click More devices and printer settings.
- The older Devices and Printers window opens.
- Your floppy drive will be sitting under Other devices.
- Right-click it. Choose Eject; the other drive options will be there.
Step 2: Recover Data from Floppy Disk
You have connected the drive and inserted the disk. There could be two scenarios:
Scenario A. The disk reads, but the files are gone.
The disk mounts without complaint. It shows up in Disk Management and in File Explorer. You can open it and browse it. However, the files you're looking for aren't there. Maybe they were deleted. Maybe they were overwritten. Maybe the disk was wiped or formatted without you knowing.
In this case, the magnetic surface is still readable. Only the file information has been damaged. The good news is the data is very likely still sitting on the disk. You will just need data recovery software, like Eassiy Data Recovery or Recuva, to bring it back. We will look at both in detail.
Problem B. The disk itself will not read.
The computer fails to recognize the disk at all. For instance, the magnetic surface might be carrying a thin layer of iron oxide. Or it hands you a few files and throws read errors for the rest. Bad sectors, a damaged magnetic coating, dirt, and mold can all stop parts of the disk from being read properly.
So the fix depends on the problem. Below are the free and paid options you can use, depending on your situation. Follow the one that matches your disk.
Perform Floppy Disk Data Recovery for Free
If you accidentally deleted files from the floppy and Windows can still read the disk, data recovery software is the answer.
A free option is Recuva. Its free version takes considerably longer to scan, but it still includes the Deep Scan feature (advanced scanning) at no cost. Keep in mind that Recuva has no dedicated floppy disk mode. If your floppies are FAT12 volumes, you can try Recuva. So it can go after files that were erased from the floppy disk.
Steps to Recover Data from Floppy with Free Floppy Disk Recovery Software
Step 1. Go to CCleaner’s or Piriform’s site. Grab the free version of Recuva.
Step 2. Open Recuva. It will list every drive it can identify on your system. Pick the floppy disk drive and start the scan.
Step 3. Send the recovered files to a folder on your PC. Do not write them back to the floppy.
Note: If Recuva does not find your files the first time, the paid version will not do anything different. The Pro tier just adds virtual hard drive support, automatic updates, and premium support while the scanning engine is the same one.
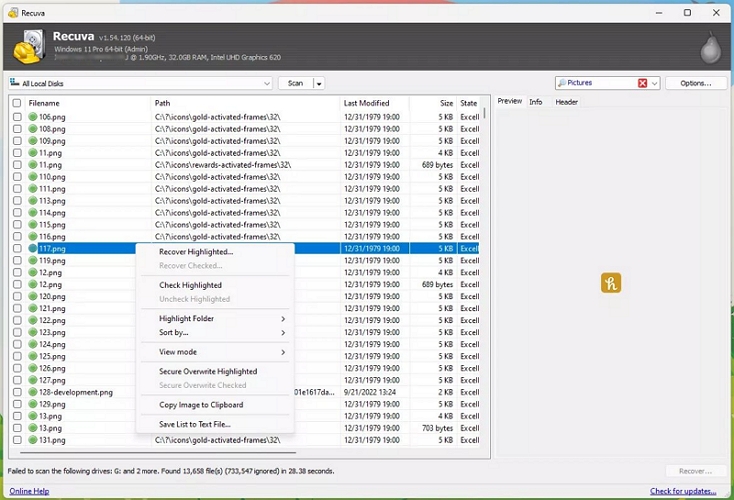
Feedbacks on Recuva
Recuva is a useful tool to try for basic data recovery, but its limitations are well known, making the process somewhat trial and error.
For instance, its Deep Scan can come up empty Even when Recuva does find files, it may recover only a portion of what is actually recoverable. The other big problem is speed. Even a normal scan of a 1.44 MB floppy takes far longer than it should.
The bottom line is simple. You can try Recuva because it’s free. However, if it doesn't recover your files, move on to professional solutions like Eassiy.
Recover Files from Floppy Disk (Paid)
You can also opt for professional data recovery software like Eassiy to recover lost files from a floppy disk. Although we’ve listed it under the paid options, Eassiy lets you scan the floppy disk for free. So you can check whether your files are recoverable before paying for a license. If the floppy disk itself is physically damaged, the next option is to turn to a professional data recovery service.
Which one you need depends on what is wrong with your disk. Here is a table to help you decide.
Often around US$1,000, sometimes more.
Deleted files, formatting, file system corruption, other logical problems. Physically damaged, badly degraded or completely unreadable disks.
Option 1. Use Floppy Disk Recovery Software
Eassiy Data Recovery is one of the best tools for floppy disk data recovery. It runs on Windows 11, 10, 8.1, 8 and 7 in both 32-bit and 64-bit. So whatever machine you have hooked up to that floppy drive, Eassiy will work with it. Meanwhile, Eassiy is compatible with all floppy models, including 3.5-inch 1.44 MB HD, 3.5-inch Amiga, 5.25-inch, 8-inch, 3-inch Amstrad, and 3.5-inch Mac 800 KB/400 KB disks, among others.
Plus, it offers a high chance of data recovery, regardless of the floppy disk data loss scenario. It can scan and retrieve data after accidental corruption and even handle formatted drives and RAW recovery.
Complete Data Recovery from Floppy on Windows 11/10
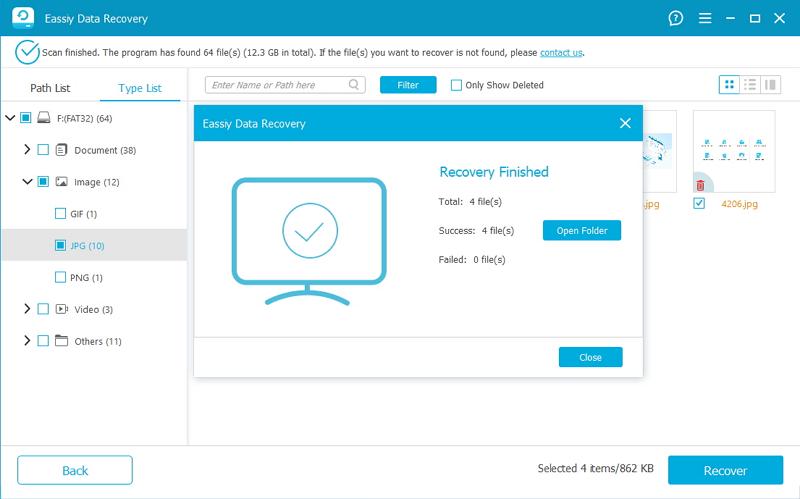
Step 1. Install and launch Eassiy Data Recovery on your Windows PC.
Step 2. Select the floppy disk containing your lost files. Then click Scan.
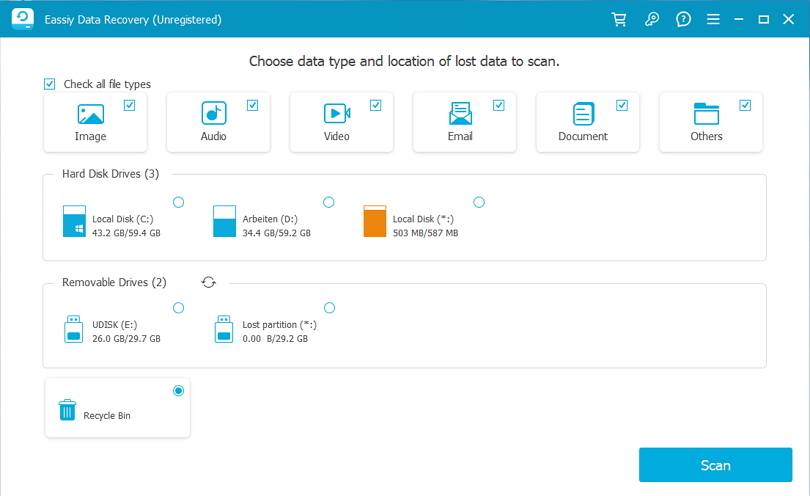
Step 3. Let the Scan finish. Eassiy runs it first and shows the recoverable files on the floppy disk, grouped by file format.
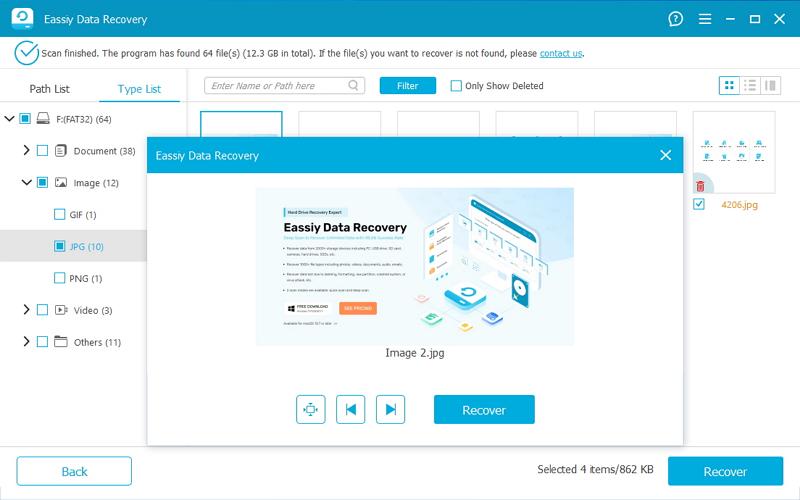
Step 4. Select your files and click Recover. Pick a safe location on your computer and save the files from the floppy disk there.
Option 2. Use Floppy Disk Recovery Service
Sometimes the problem is with the floppy disk itself. For instance, the magnetic surface could be damaged. There could be contamination or some other physical problem entirely.
With a real physical problem, the computer will fail to read the disk at all. So in that case, you’ll have to take it to a professional data recovery service. They will provide suitable services and try to recover the data using advanced hardware in ISO-5 Clean Rooms. For instance, if a coating is on the magnetic surface, a specialist can clean it so the floppy becomes readable again.
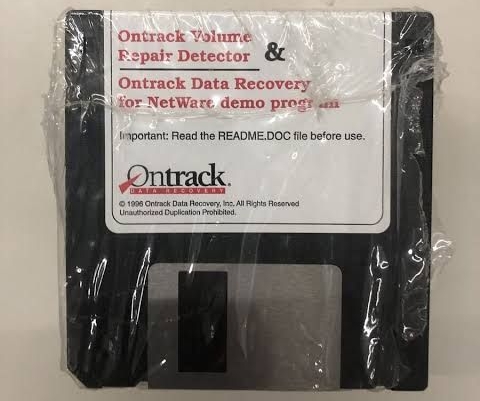
You can opt for local services if they offer floppy disk data recovery. Just search for a floppy disk conversion service near me to see whether anything suitable is close by. But it is usually safer to choose a national services that specialize in floppy disk recovery, like Ontrack, DriveSavers, Gillware, SalvageData, etc.
You can contact several services and compare how each works and the cost estimate. However, expect to pay considerably more than software. Different services will charge differently. For instance, DriveSavers quotes between US$700 and US$3,000 or more. Ontrack typically runs US$500 to US$1,650 for a standard job.
Final Words
Start by finding the right drive for your floppy disk and get it plugged into a Windows computer. This will tell you whether the floppy disk is readable or the computer cannot recognize it at all.
If it reads and your files are simply deleted, you can use Eassiy Data Recovery to bring them back with a high success rate. It is the go-to for retrieving data from all kinds of floppy disks among community members.
If there is physical damage and the disk isn't recognized even on a different computer, you have to opt for a data recovery service.